For the third time in 3 years, I embarked on the journey known as ”replacing your phone battery” on my 2016-vintage Google Pixel that had been absolutely ravaged by Pokémon Go. iFixit have a pretty good replacement guide that walks through the process, which I more or less followed each time.
Why did I decide to write about this?
What’s so interesting about changing a battery? Not that much to be honest beyond my mild irritation at needing to do this for the 3rd time in as many years, after my first battery lasting 3 years, the first replacement lasting two, and the most recent less than one.
I got my OG Pixel a few months after launch when they were still nigh-impossible to find. From that point, the phone was a treat and did all the things typical mobile phones do, like play Pokémon Go. If you’re not already familiar with it, Pokémon Go is an augmented-reality game where you catch Pokémon wherever you are in the real world. Because the game keeps your GPS active while playing (on top of running the game), it can drain batteries pretty fast.
For some reason, my phone started dying with anywhere from 50%-75% of its charge left and I was basically tethered to a charger. This was fine at the office, the car, and my home where I had ready access to power, but it was tough to use my phone for much else while out and about unless I brought a portable battery with me.
I learned while Googling that this was probably due to a failing battery. I already knew that each charging cycle degrades the battery a bit and it won’t hold quite the same amount of energy when ”full” after a while, but what I didn’t know was how difficult it is to calculate the current state of charge outside of a laboratory setting.
The BLUF is: Your phone’s OS calculates it based in large part on the voltage provided by the battery, and Li+ batteries don’t discharge at a consistent rate. The voltage dips a lot as it comes down form 100%, then from say 80% to 20% it stays roughly constant before dipping significantly again. The OS might additionally make some assumptions to make an educated guess of how much gas is left in the tank, regardless of how much actually is…cue getting a replacement.
Replacement #1 – Spring 2019
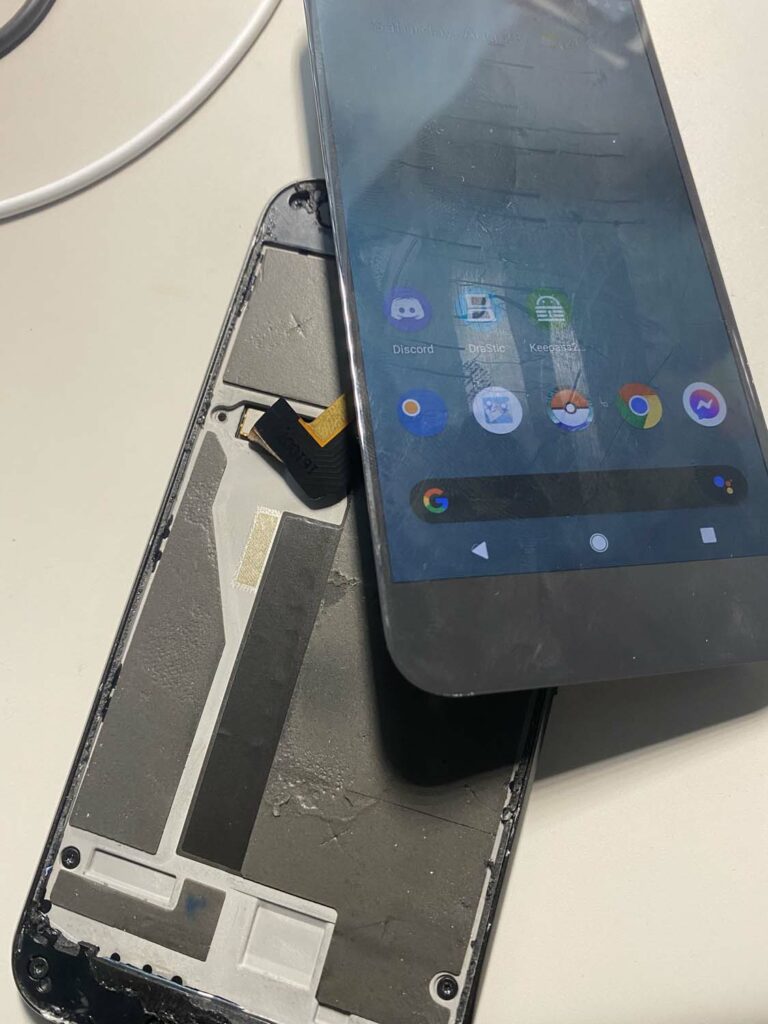
I don’t have too many photos of the disassembly (I do for the third round), but suffice to say it went well as you’ll see in the handful of photos below.
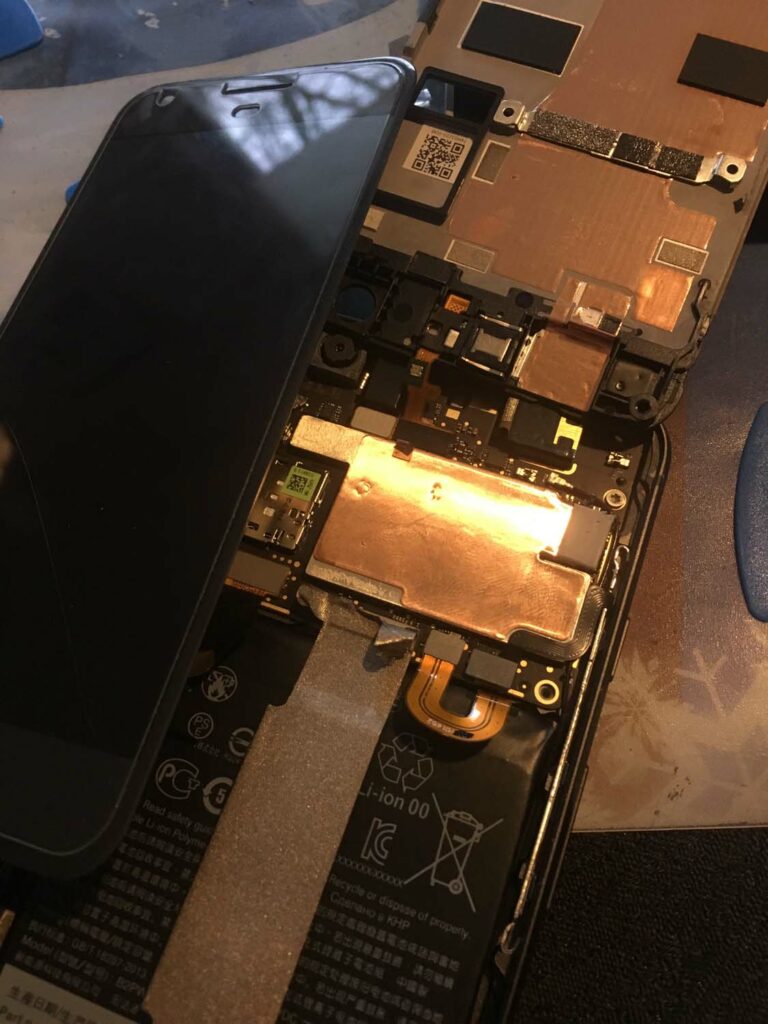
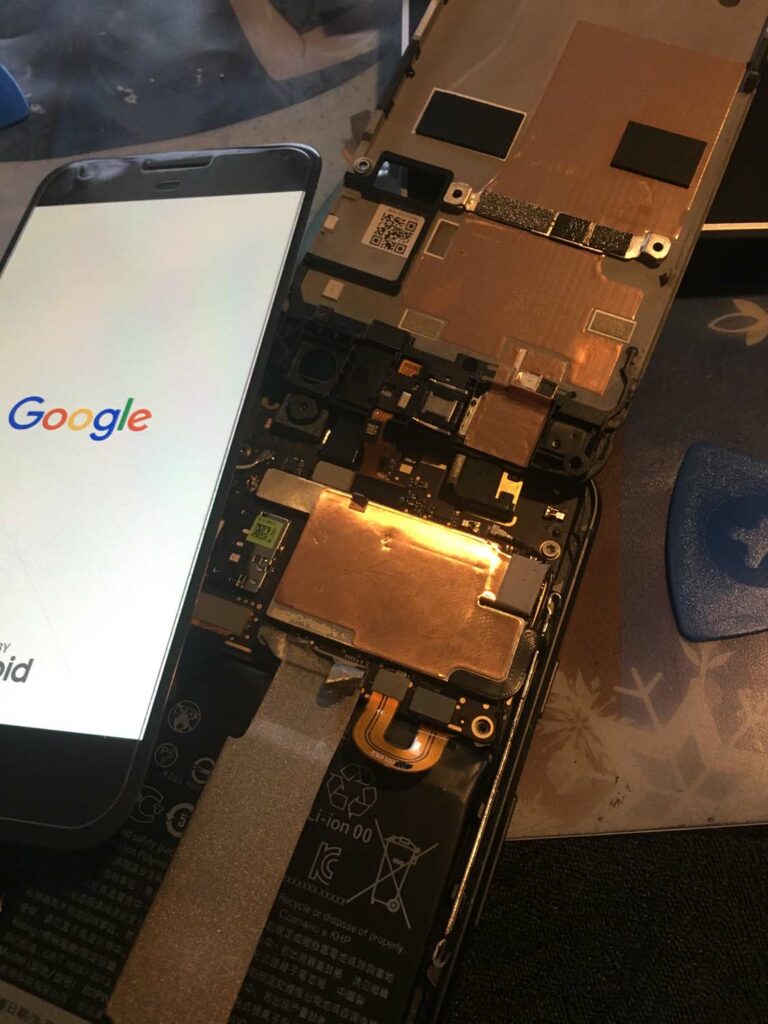
I followed the iFixit guide to do the replacement, and to be honest the most difficult part was removing the display. It probably took me well over an hour, repeatedly heating the iFixit hotpack to soften up the adhesive just enough to pull back the display and slip a fancy guiar tab underneath without snapping the display. Once I got that first tab in, it was pretty easy to slice my way around the phone and once it was off, undoing the handful of clips and screws to get at the battery was easy.
It breathed brand new life into my Pixel! PoGo ran like a dream! However, I made one mistake: I damaged the loudspeaker on the bottom of the phone. To this day, I still don’t know how exactly I did it and there’s no obvious sign of damage to the speaker or its associated circuitry, but even after several more disassemblies immediately following this and during subsequent replacements, I never got it working…The inability to set an alarm was a dealbreaker, so I wiped my dear wife’s old iPhone 6s and since then have dove headfirst into the iOS ecosystem after being a diehard Android user since the 2008 launch of the HTC G1 / Dream (talk about a time capsule).
Replacement #2: Summer 2021
My new battery’s been kicking around for 2 years now, and isn’t quite holding the charge it used to. Not too surprising, but I noticed my phone developed a bulge.
Seek medical treatment a replacement battery if your phone develops a bulge lasting more than 4 hours.
Puffy pillow batteries are super dangerous and can cause fires. I order a new replacement and pull up iFixit’s trusty guide again to disassemble the phone again. I even got some photos of that big, bulging battery so you can see how much bigger it is than a fresh one. It even stretched the ribbon cable that connects the mainboard and daugher board; it’s supposed to be flat across the battery.
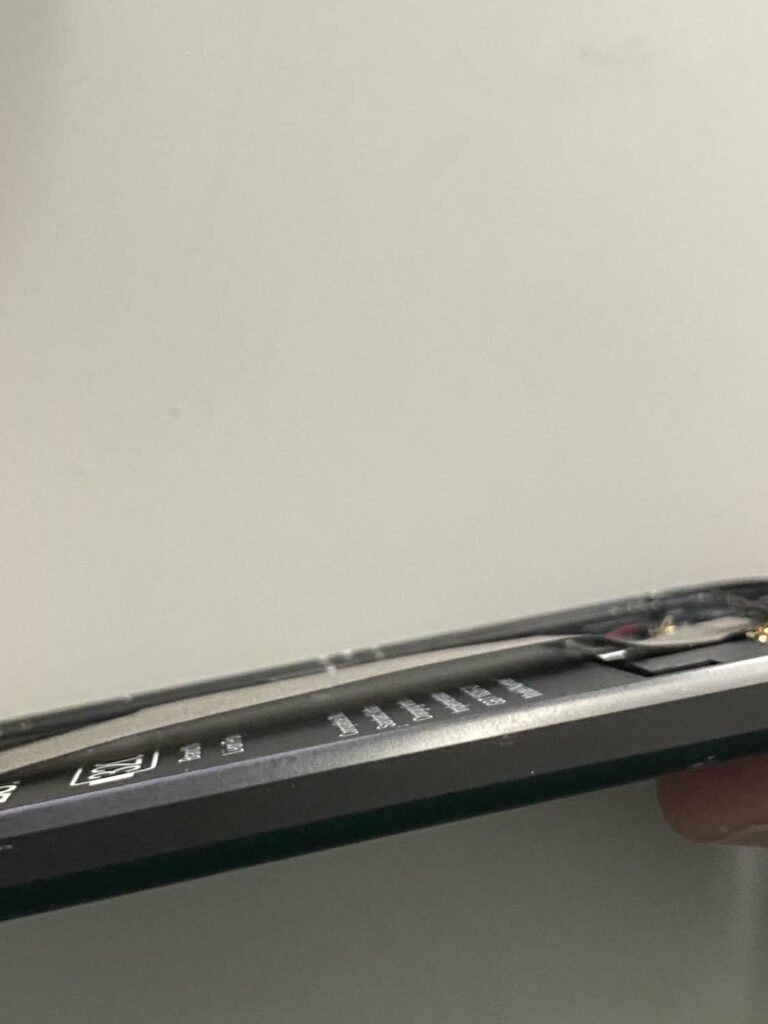
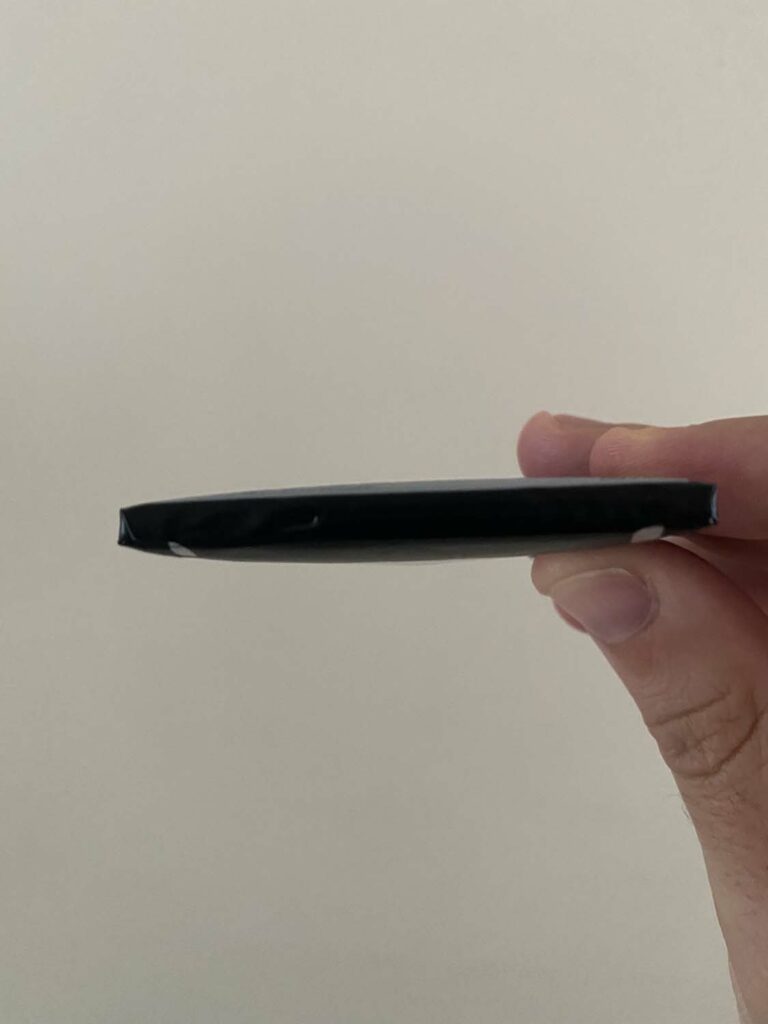
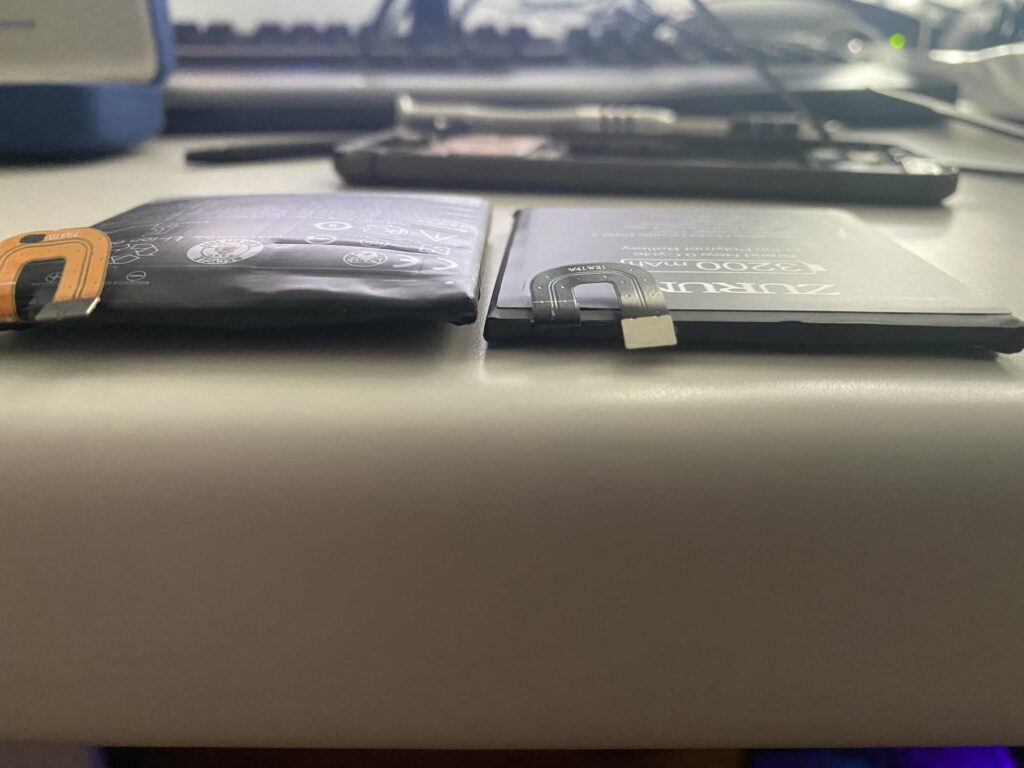
After installing the new battery, I’m back in business, but still no loudspeaker…
Replacement #3: Spring 2022 (third time’s a charm?)
Again, battery doesn’t quite hold the charge it used to, which isn’t totally unexpected. I downloaded an app called AccuBattery to see how much of a charge it holds, and surprisingly it shows ~ 58%. I’m not sure how accurate it is, but regardless that’s a lot of lost capacity. I got the sense it had a slight bulge and took it out of its case to get a better look at the chassis.

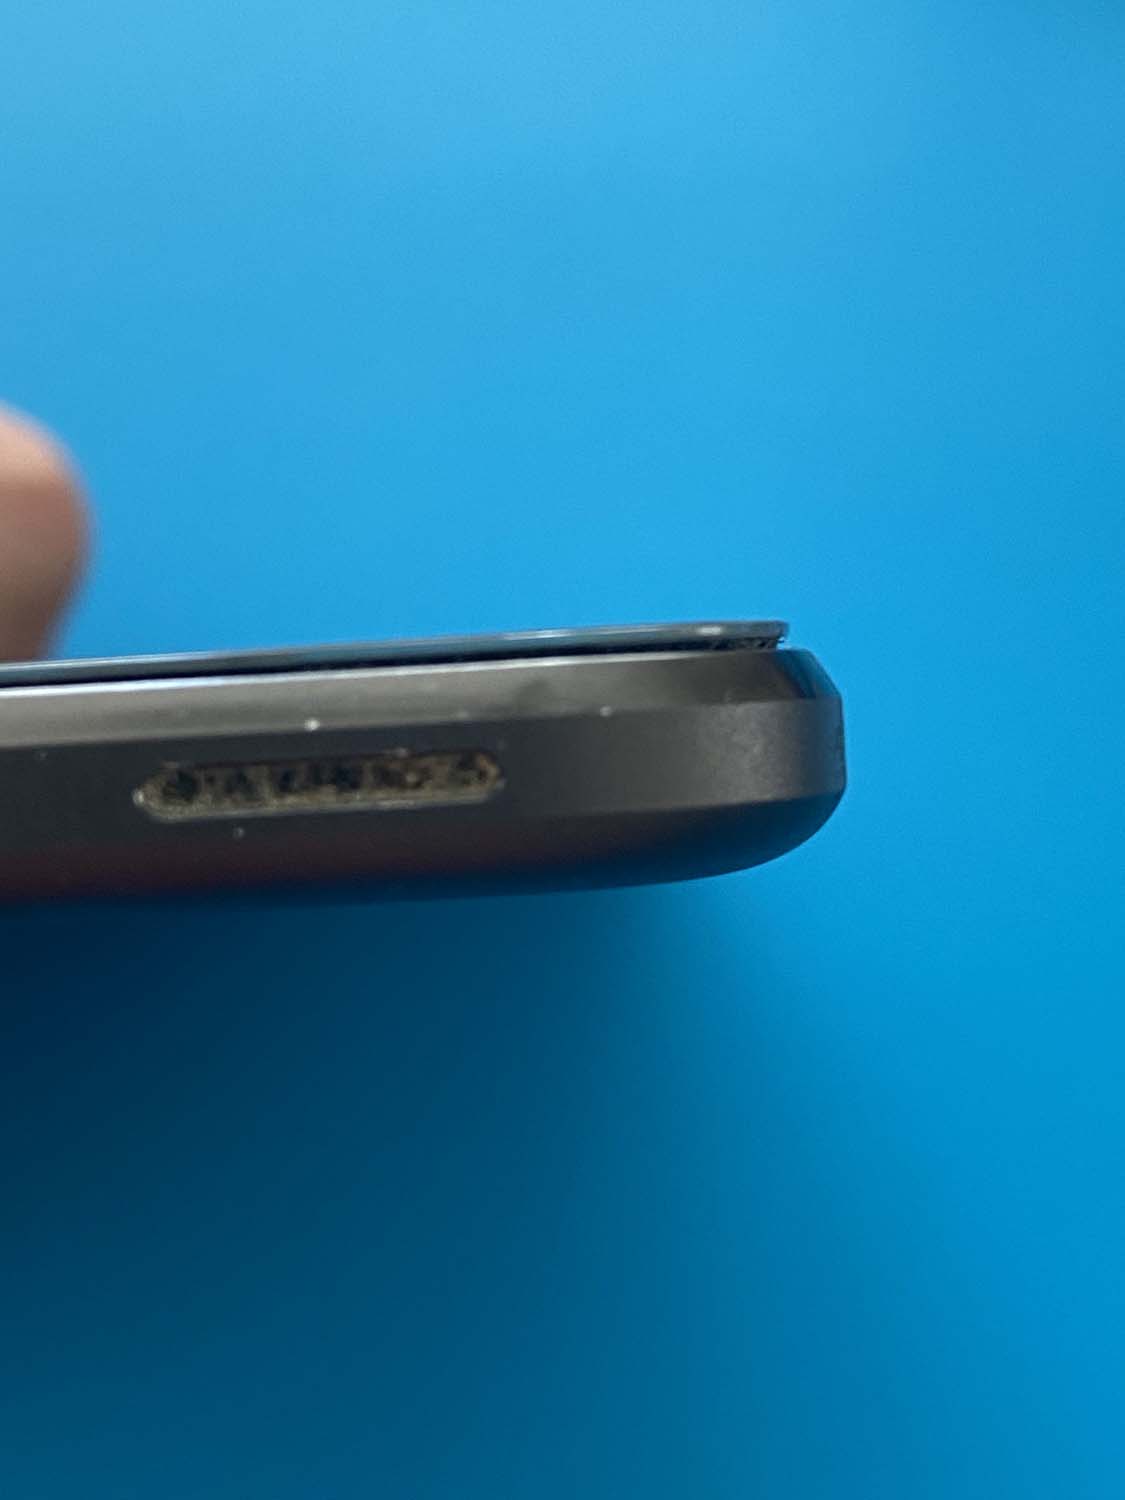
Holy. Cow. The bulge has literally pushed the display out of the frame along all four sides. Yikes! Off to order a new battery. I swear I don’t even need iFixit at this point, but at least I can skip the hardest part, which was softening the adhesive! Once the new battery arrives, I go through the disassembly/reassembly process, photographing as I went because I have the memory of a goldfish.
Side note: An electronics mat is so damn helpful for doing stuff like this. I got one last year to protect my desk and table from a soldering iron. Some of the compartments are magnetic which helps keeps teeny-tiny screws in place.
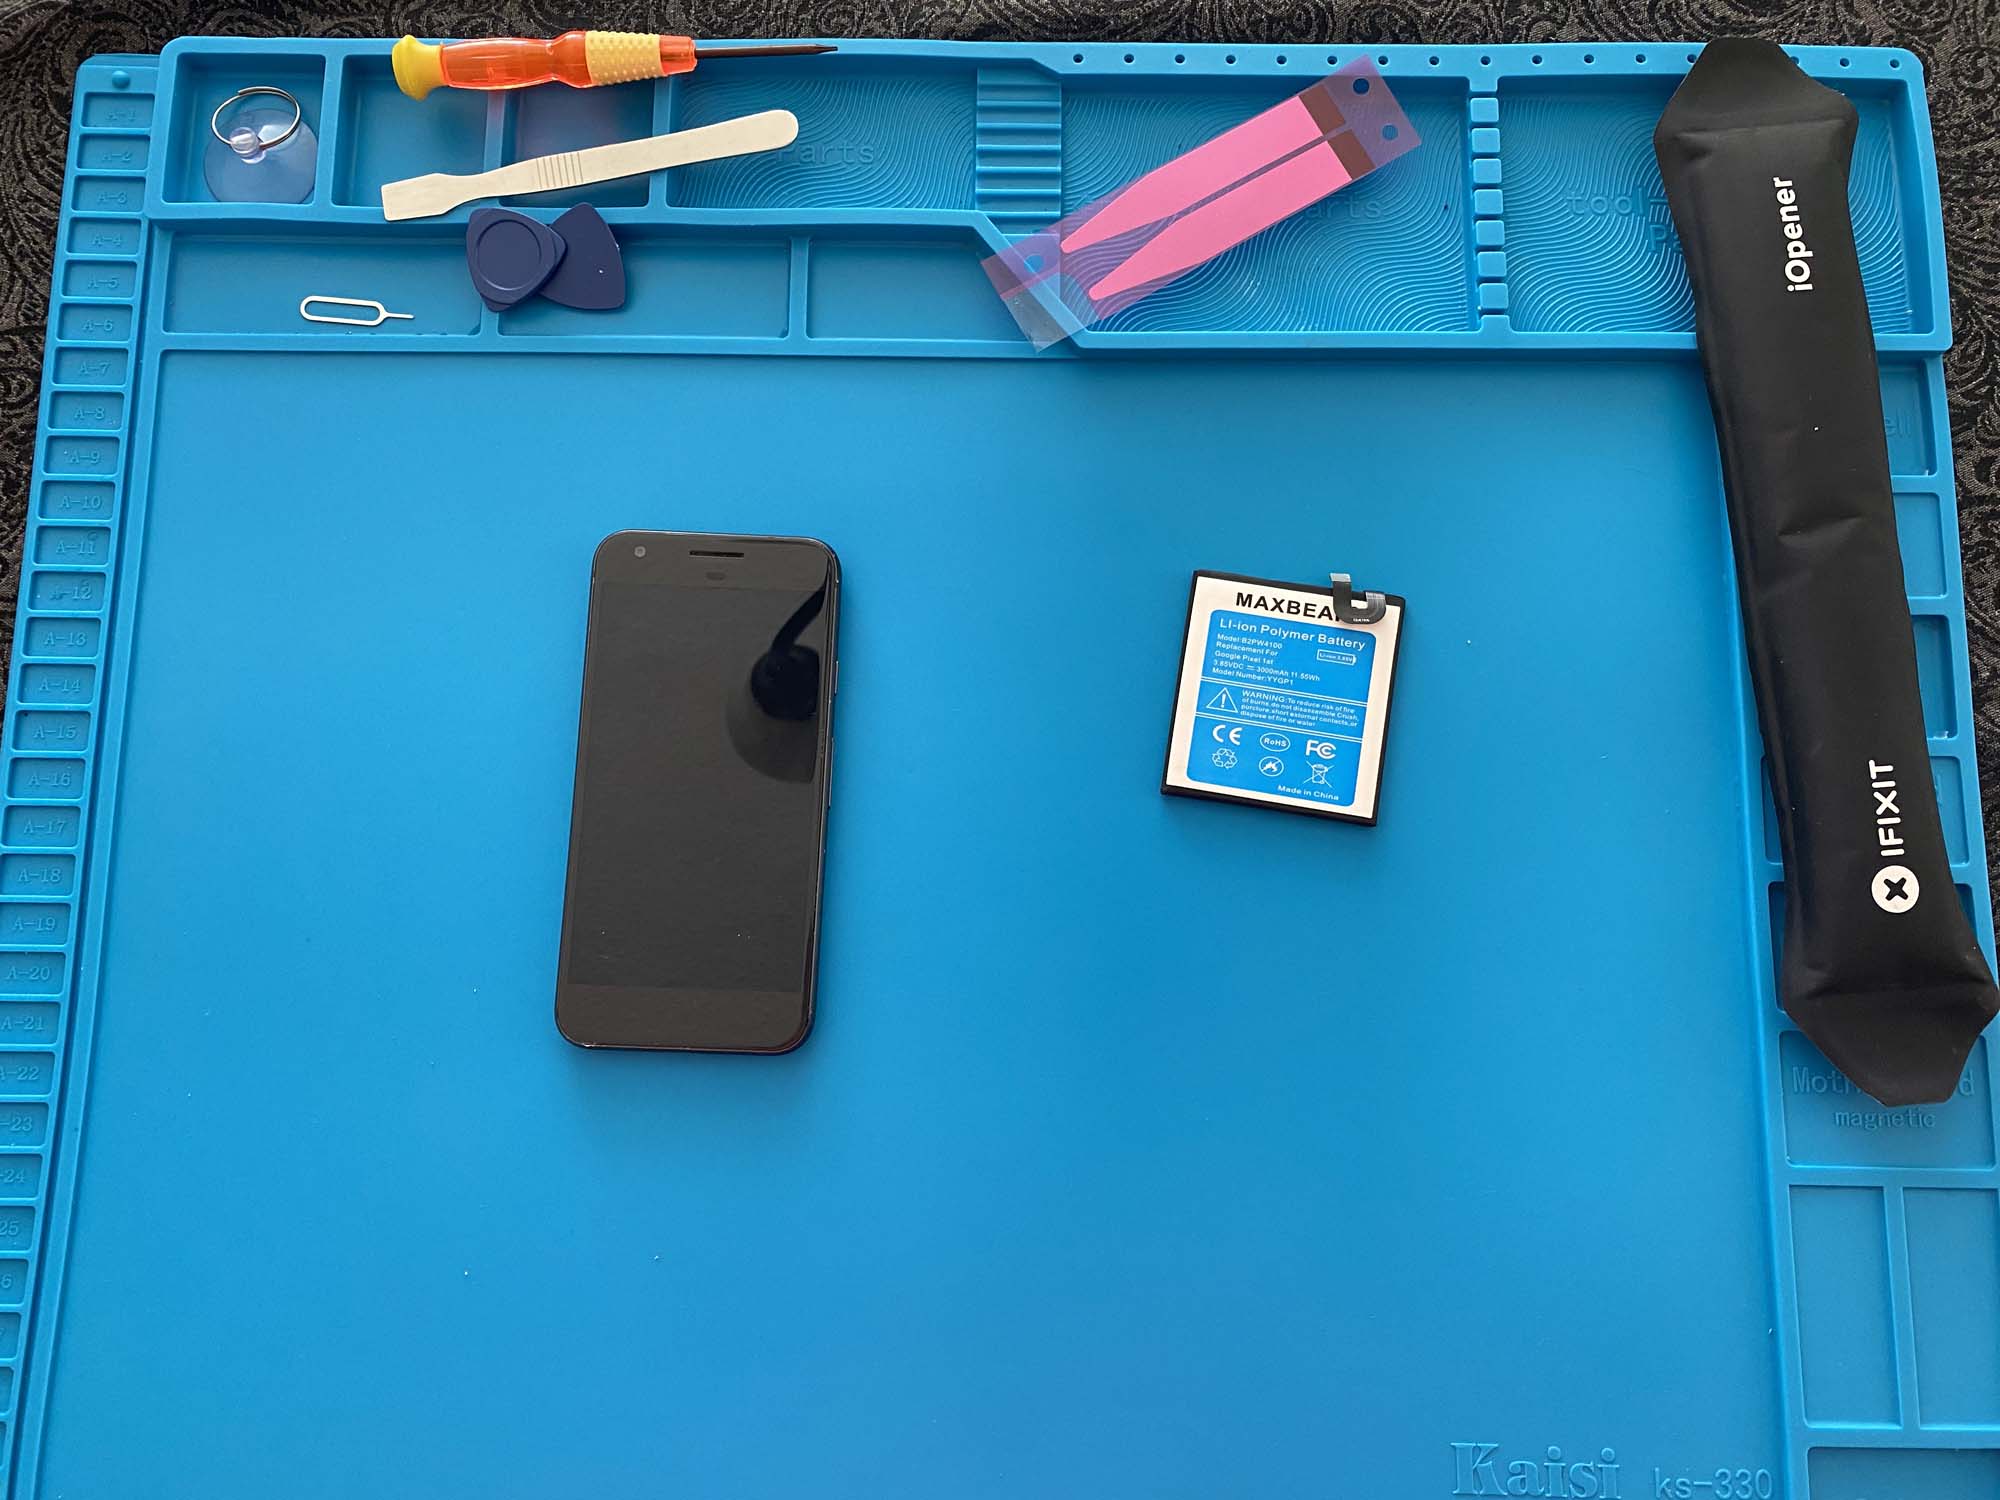
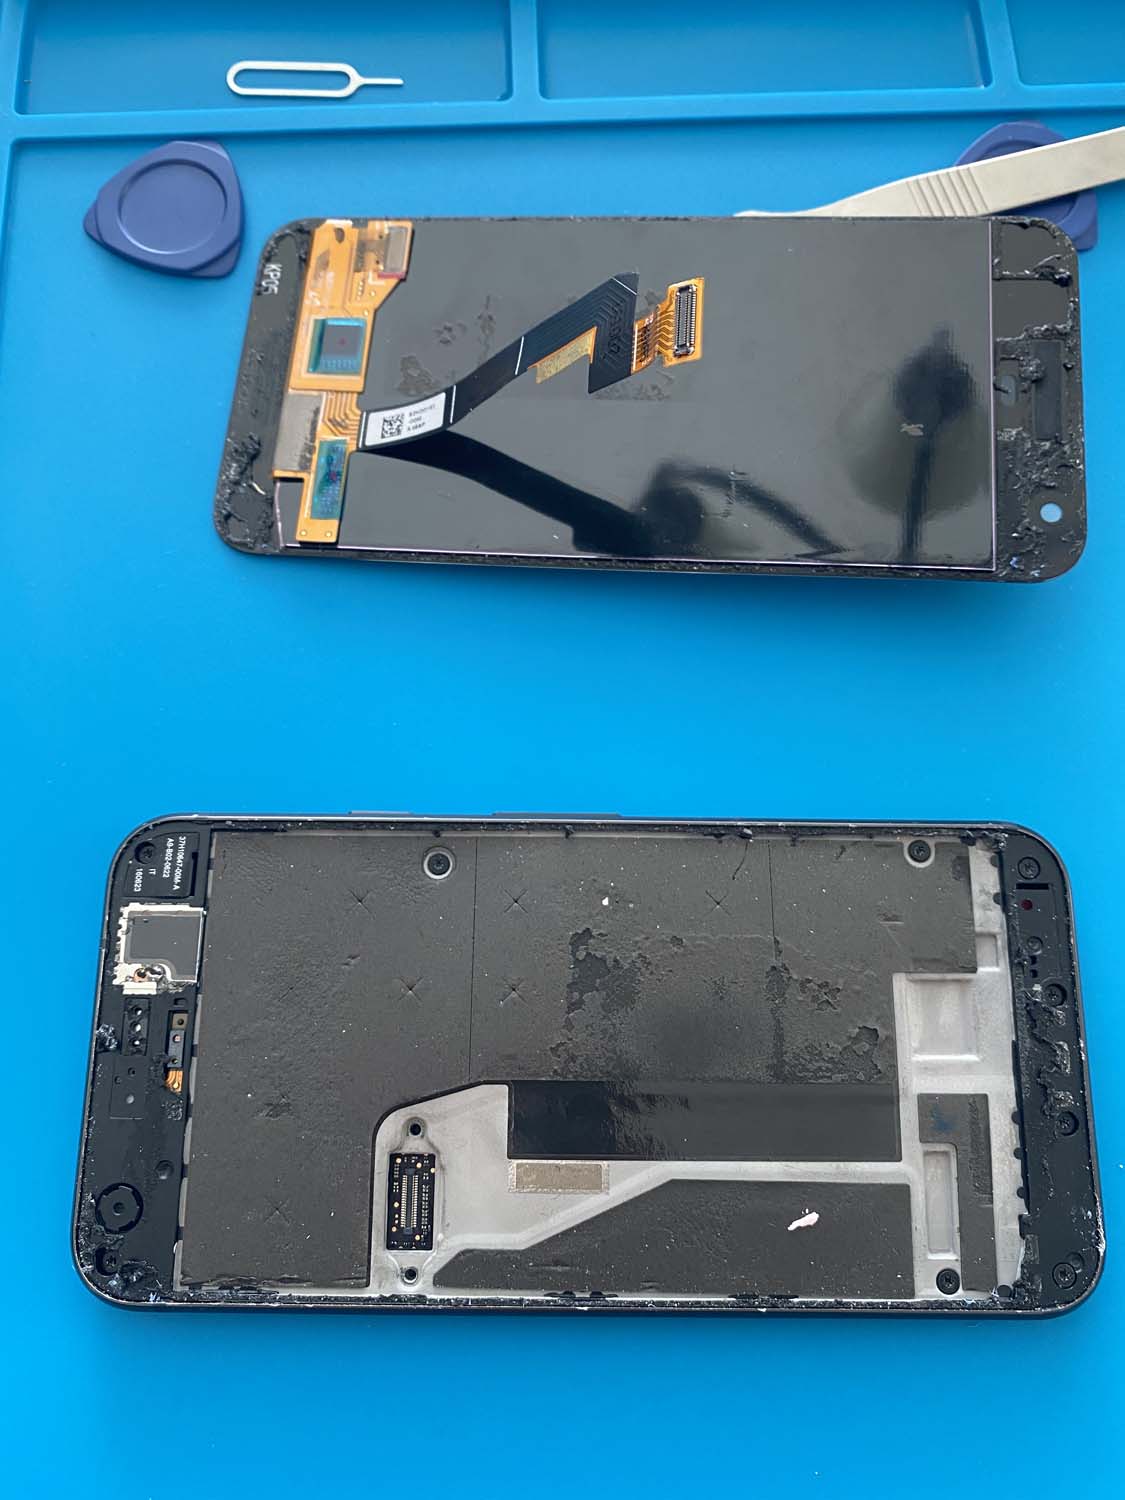
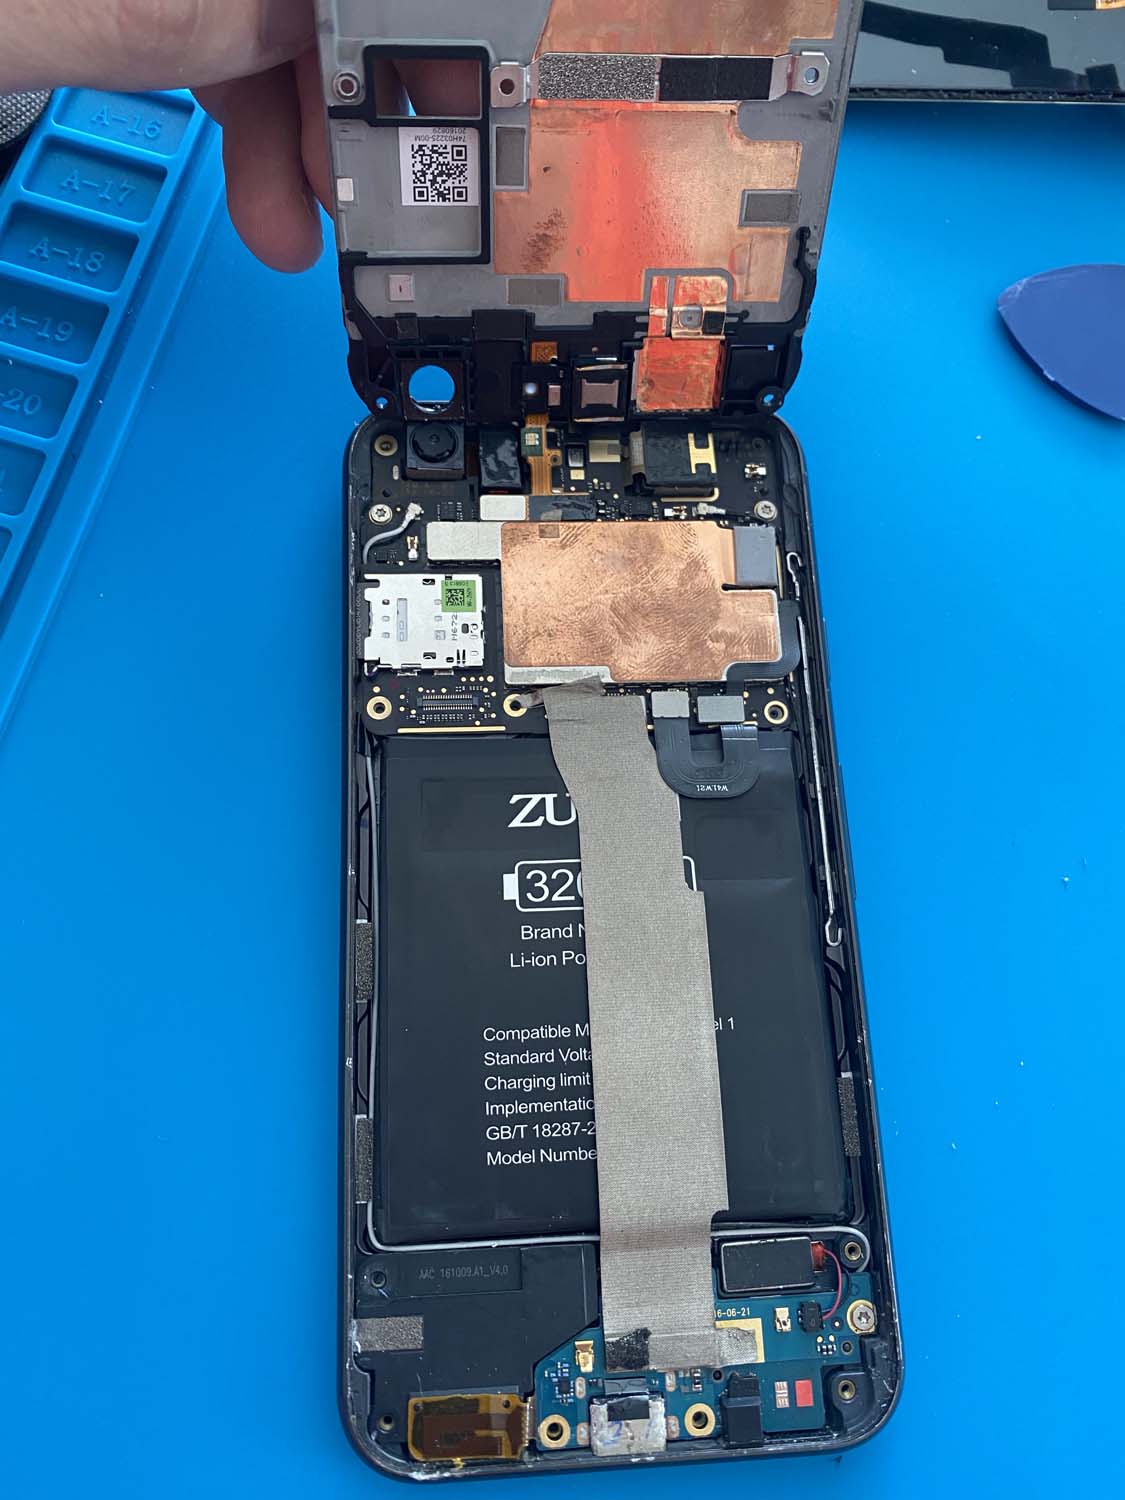
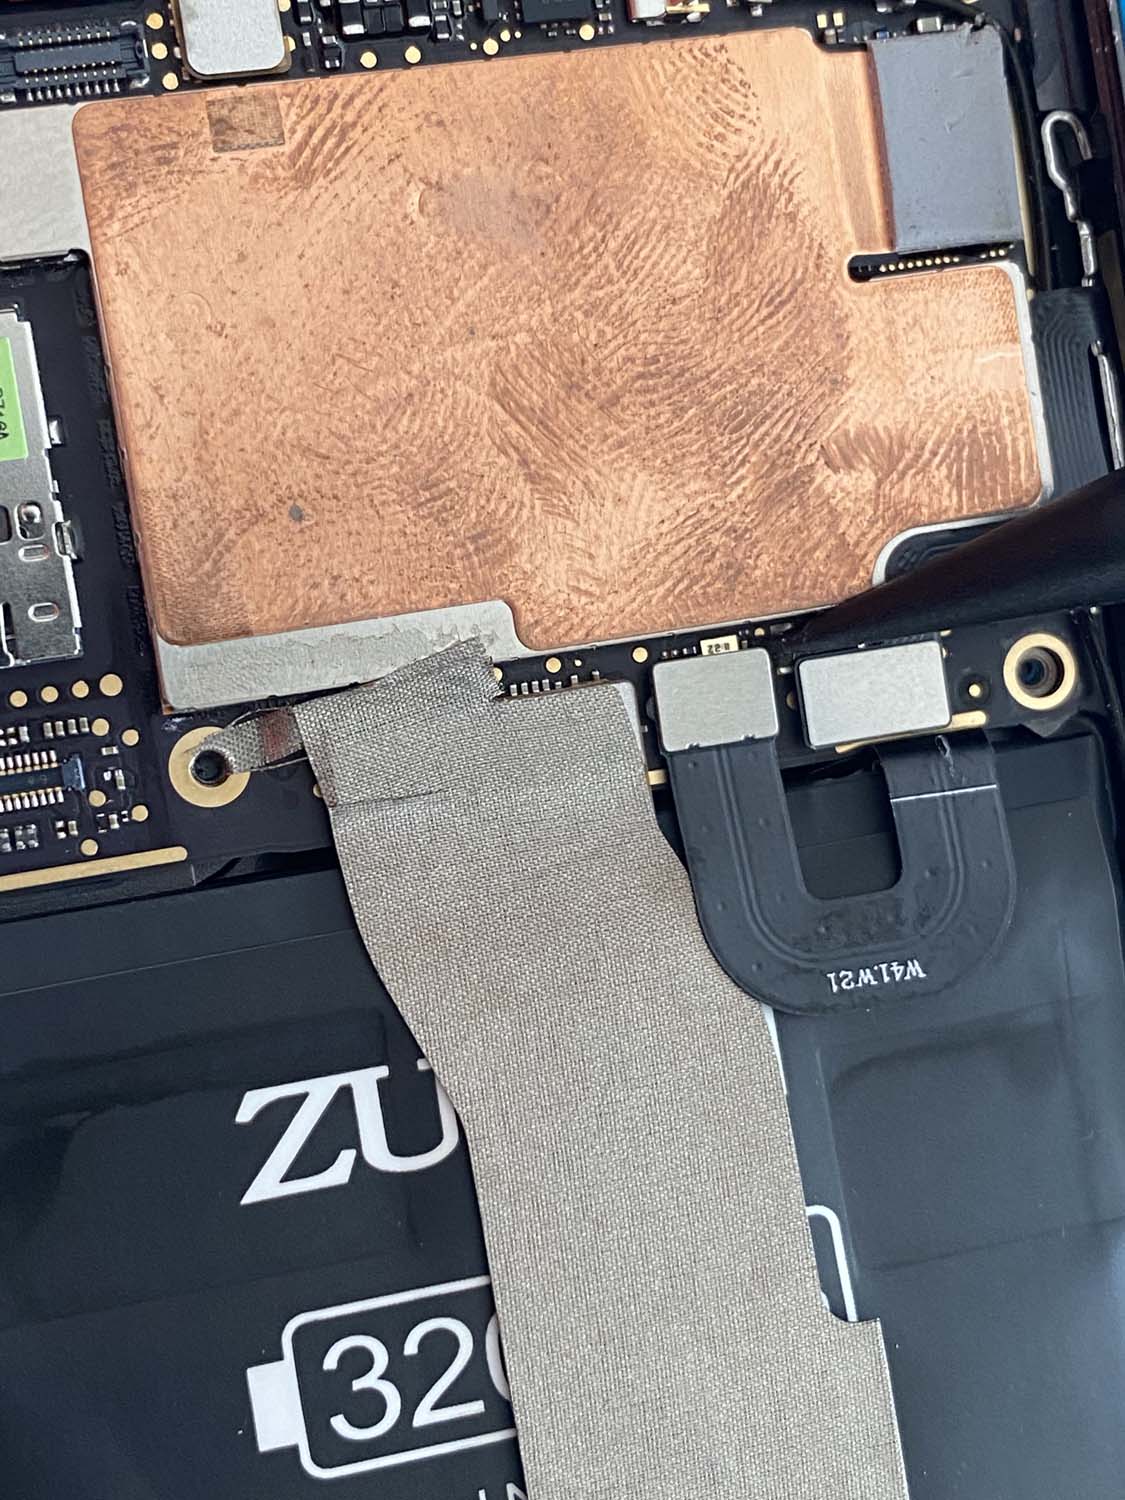
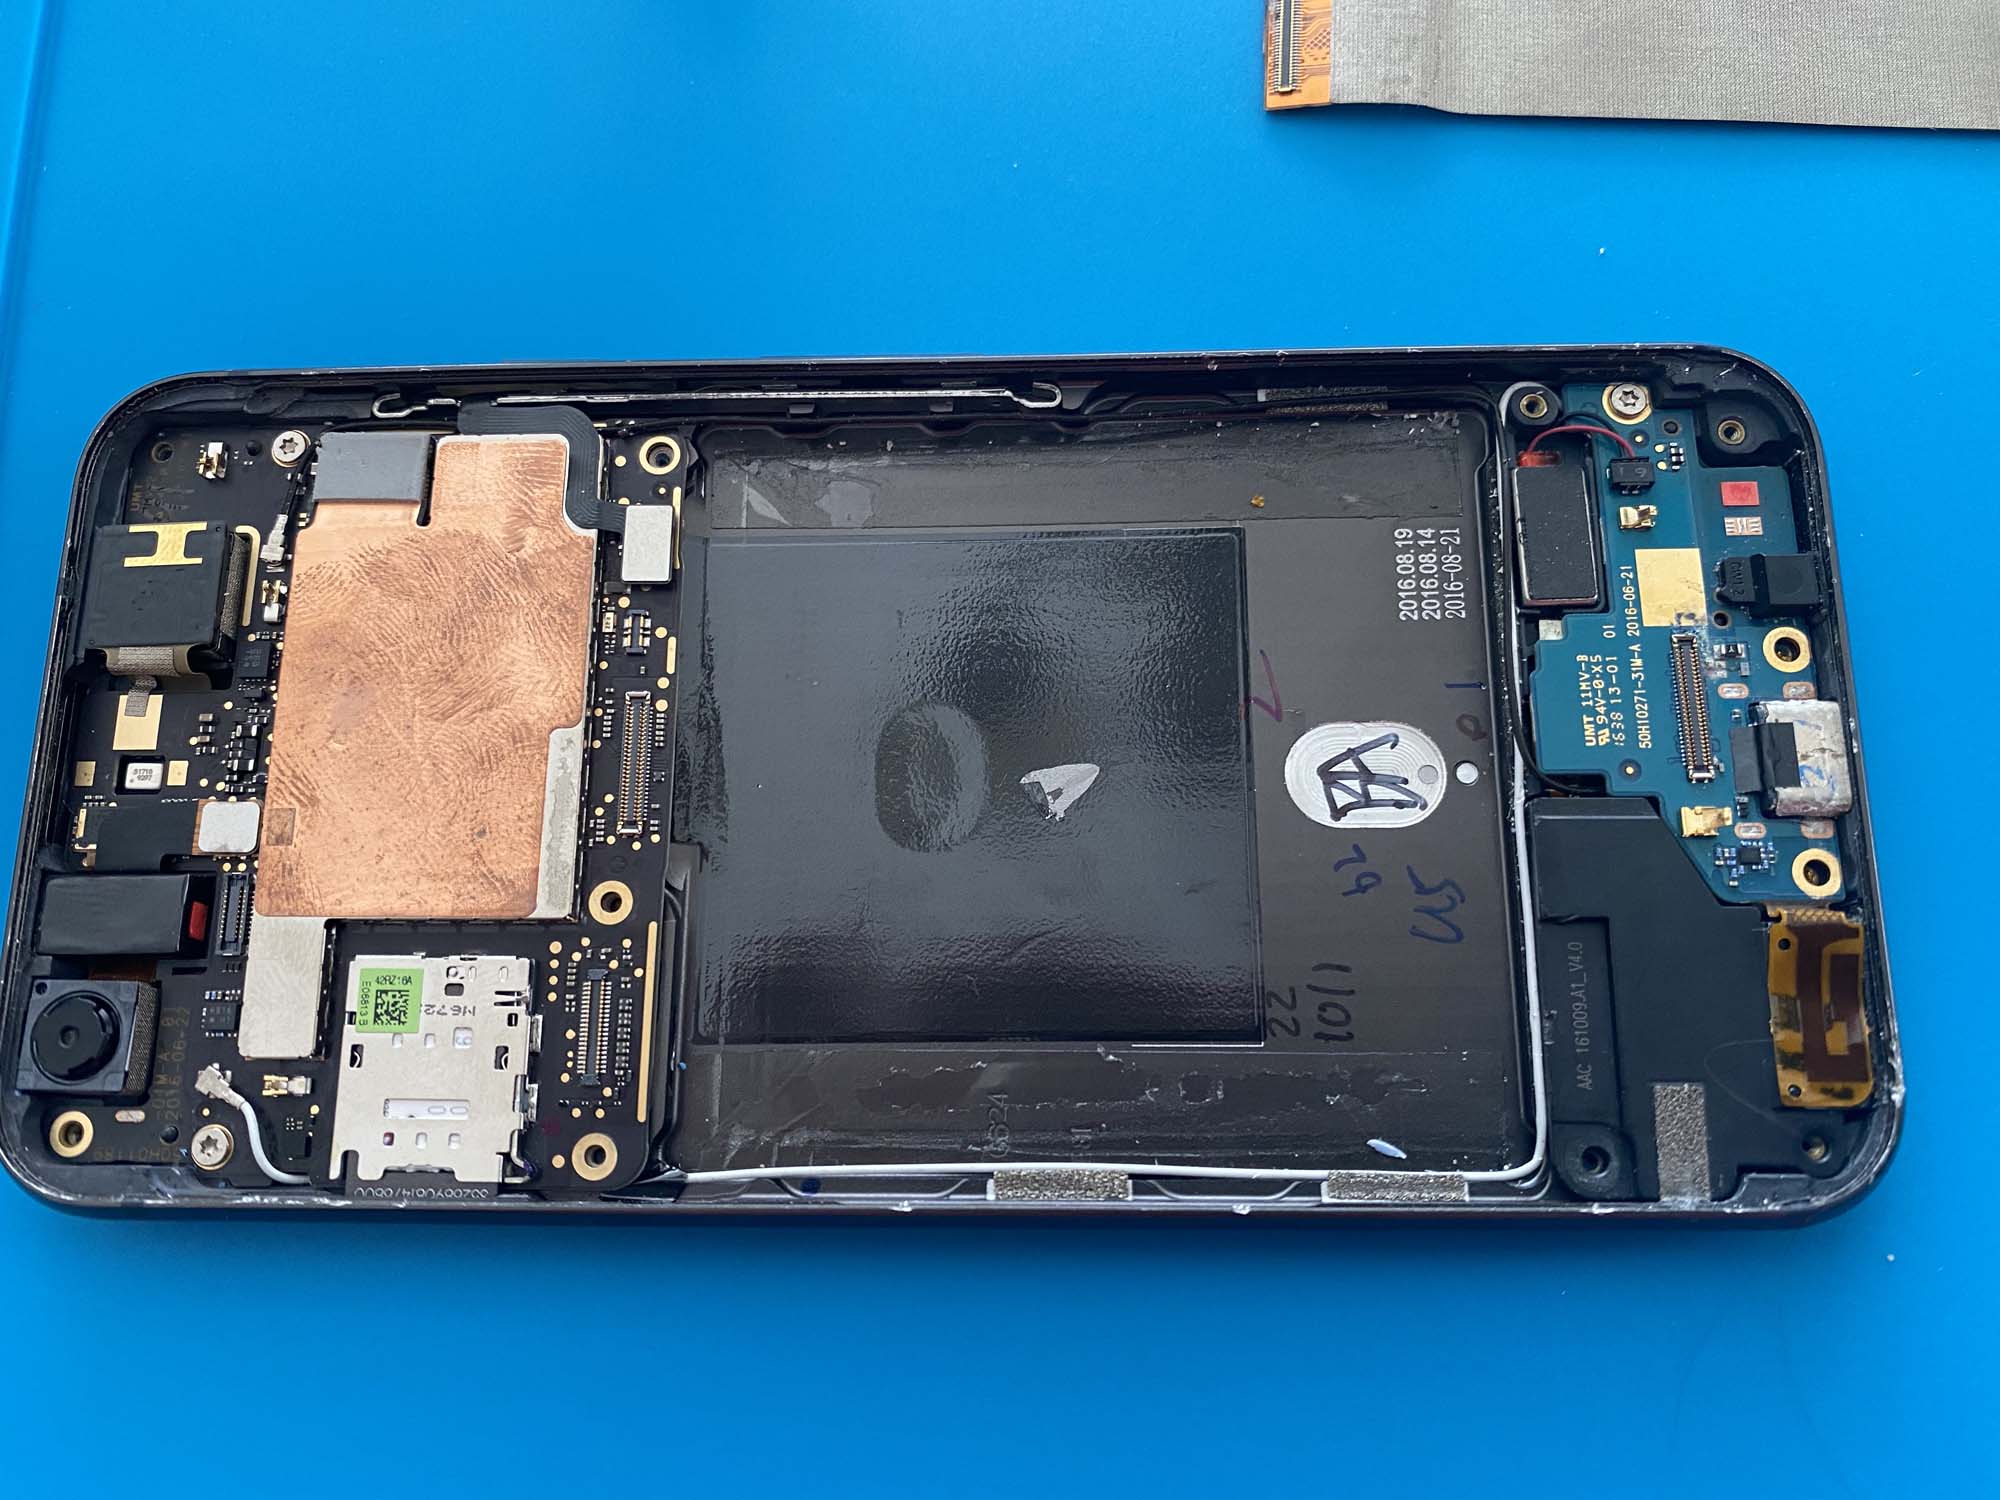
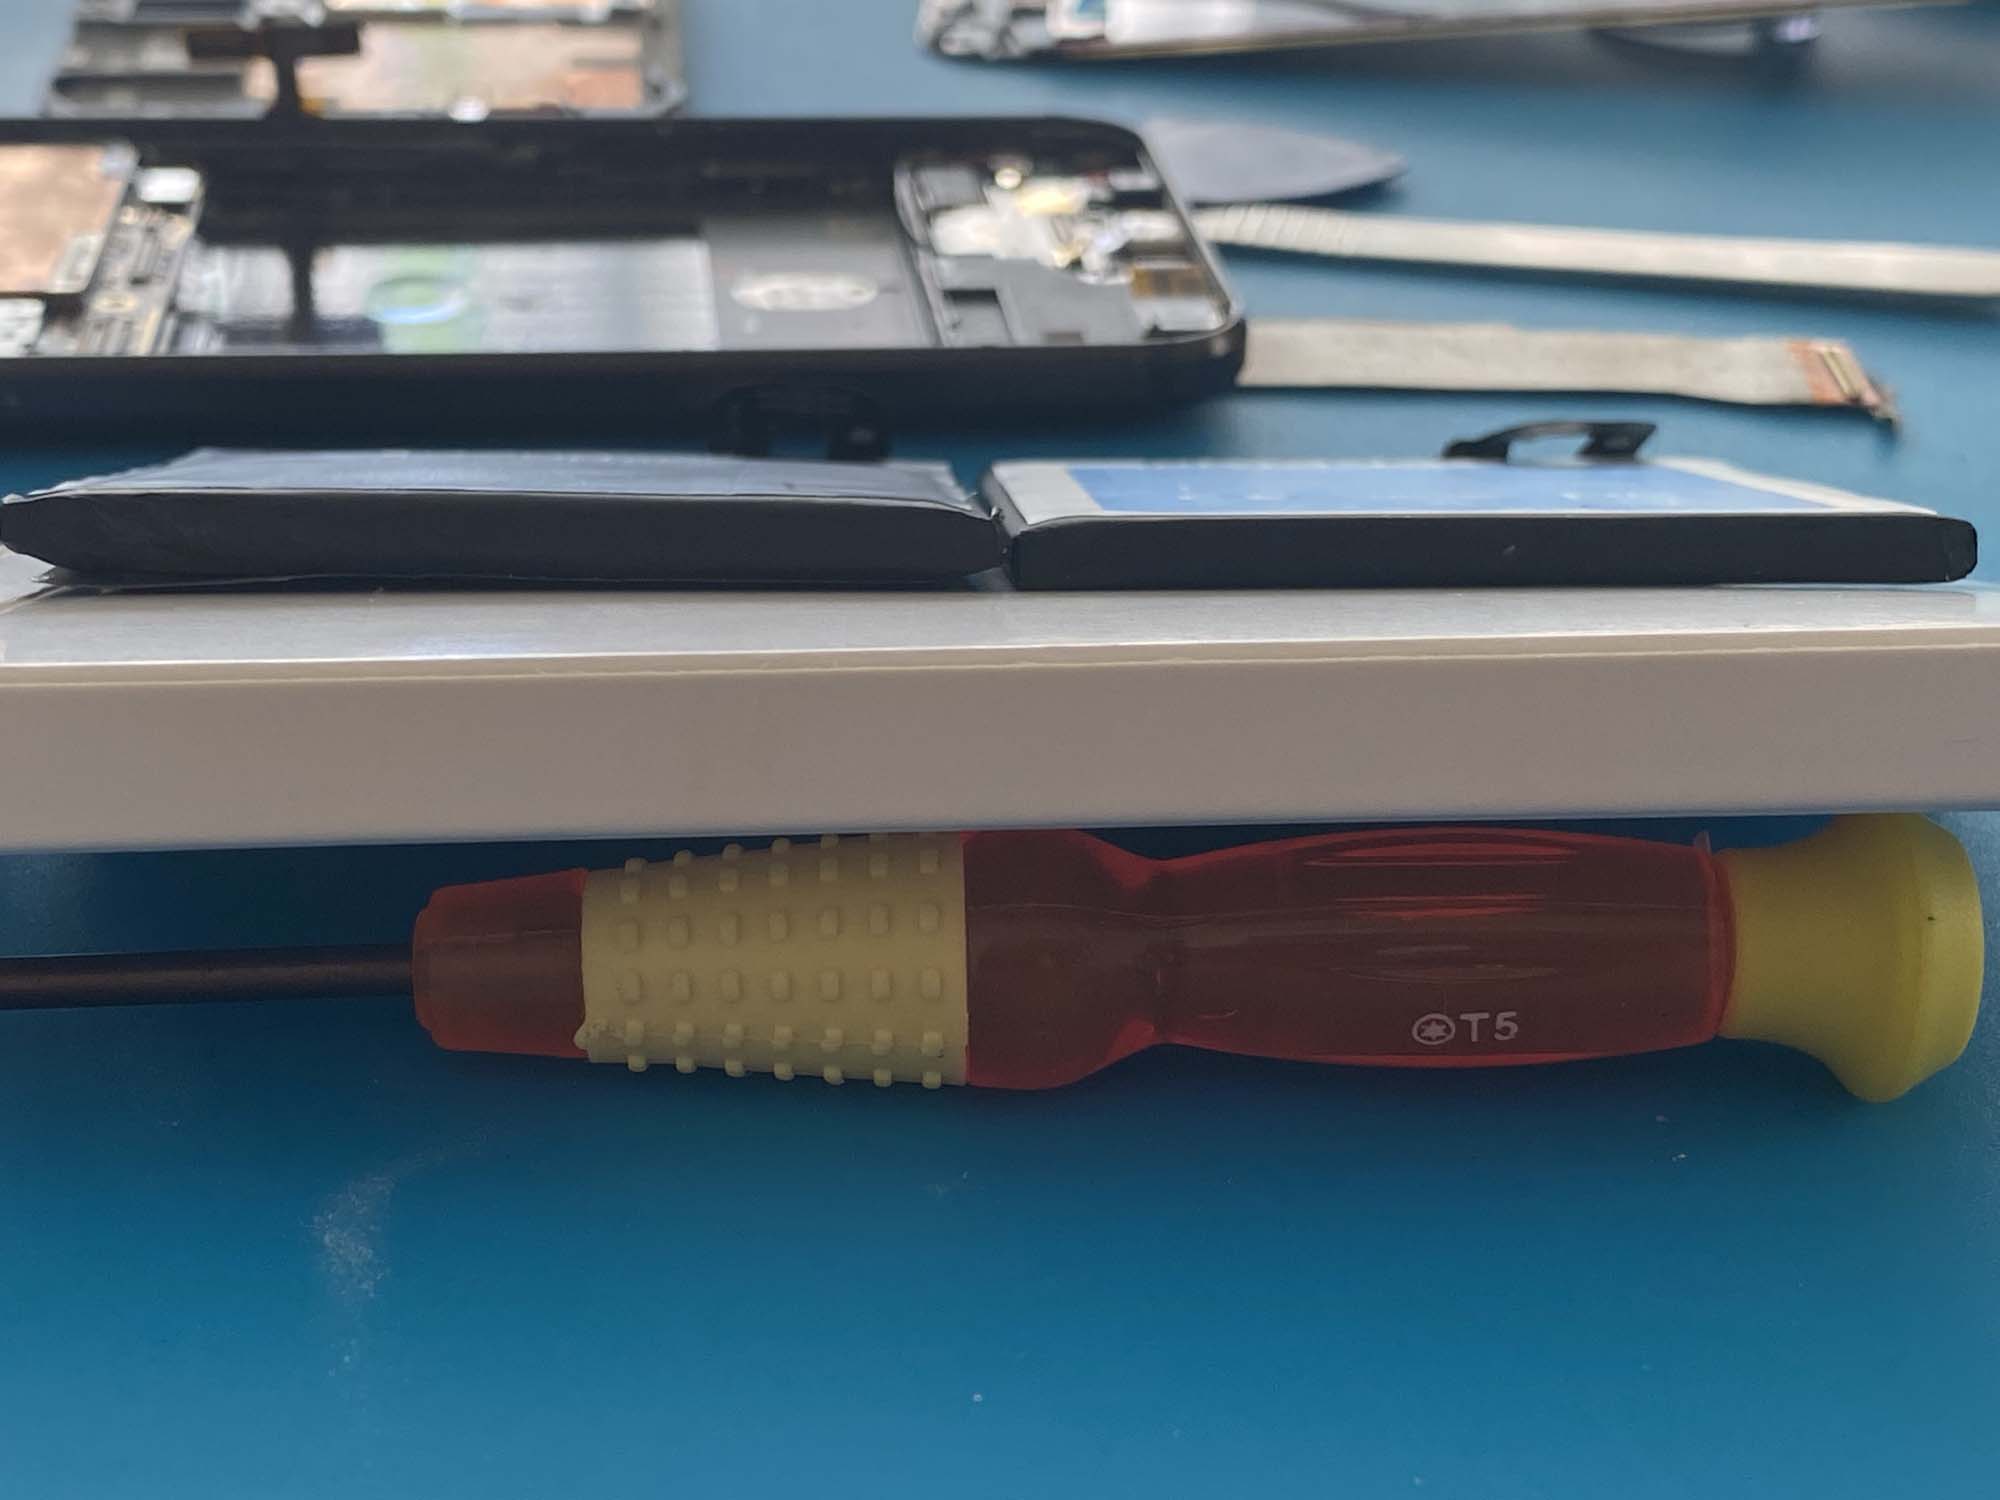
Thankfully I didn’t run into any problems here. I was surprised when I got the display that the midframe was noticeably pushed up, but I suppose that explains why the display was separated from the rest of the chassis. That old battery looks absolutely massive next to the new one.
You can see in the bottom left of the full-body shot (#3) the loudspeaker assembly in the lower left. I took a closer look at the board where the USB port is hoping to find something broken or disconnected, but everything looked in order. Dammit. So I put everything back together and fire it up…It boots!!
A few seconds after showing the big multi-colored ”G”, it turns off. Should I have let it charge more instead of testing right away? About 10 or 20 seconds later, the screen turns on again and it starts to boot. Then goes blank and repeats at about the same cadence for a bit. Crap, it’s a boot loop…
I’m able to get into the bootloader menu by holding volDn + Power in-between boots, but can’t get into Recovery or anything else for that matter to really do anything besides power it off. Interestingly, the little battery charging animation that pops up when the phone’s off but charging doesn’t pop up so I decide to let it sit for the rest of the day.
The next day, same thing. I leave it powered on in the bootloader to drain the battery and try again. Now, it won’t even start so it’s clear the phone’s not charging. Did I image the USB port somehow?
I took the phone apart and put the old puffy pillowy battery into it. Thankfully, I neglected to follow proper safety precautions and drain the battery before removing it, so it still has a “full” charge. I plug it back in and….
Boot loop! WTF?
I let it drain, but still can’t charge it.
Post-op report
I’m completely flummoxed at this point. This is what I know:
- Phone bootloops after installing new battery
- Phone bootloops after reinstalling old battery
- Phone will not charge under any circumstances
I must have damaged some component at some point in the disassembly or reassembly, but I’m not really sure what exactly. I suspect that when I reviewed the USB circuitry I damaged something, but everything still looks in order, and the battery was disconnected so I don’t believe I shorted anything. Damage there would definitely explain the lack of charging, but not why both batteries prompt into a boot loop.
After all of this, I had a nifty closing to wrap things up coming to terms with the loss of unlimited Google Photos storage forever and the search for a cheap replacement like the Pixel 4A because of how aggressively Android phones depreciate.
However…
Before packing up the replacement battery to return it, I decide to give it one more shot. Sure enough, after a few more attempts…Success! It boots! The one thing I did differently was change the orientation of the cable that connects the mainboard to the daughterboard. Apparently I connected it backwards!!! I never thought to compare its orientation with the disassembly photos I took (or iFixit’s guide).And that was the issue the entire time.
What comes next
It’s always fun to take things apart, and I learned a few valuable lessons:
- Don’t touch anything you aren’t 100% focused on fixing right now, like the daugherboard…
- Take care of your battery so you’re not tearing your phone apart so frequently
- Make absolutely sure you reconnect everything the exact same way you disconnected them.
Niantic must get kickbacks from battery manufacturers
It’s too late to cancel the Pixel 4A order, but thankfully it was dirt cheap…and inevitably if I could cancel it, the day after I did I just know the Pixel would die again.